Parade floats are more than just moving decorations; they’re a vibrant expression of team spirit, community pride, and creativity. Whether you’re crafting a float for your high school’s homecoming, a seasonal festival, or a special event, bringing your vision to life can seem like a daunting task. But don’t worry—with the right tools, creativity, and a foolproof process, you can create a standout float that dazzles on parade day.
This guide will walk you through how to make a parade float with simple steps for designing, building, and decorating, while inspiring excitement and ease throughout the process.
Start with a Trailer Bed or Vehicle
The foundation of your parade float is critical, so start by deciding on the right base for your design.
Choosing the Right Base
- Trailer Bed: The most common option is a flatbed trailer pulled by a car or truck. Trailers provide ample space for decorations, props, and seating for riders.
- Decorate a Vehicle: Alternatively, you can use a car parade float kit or truck parade float kit to transform a vehicle itself into a float for a more compact option.
Sizing and Safety Tips
- Pick a trailer size that comfortably fits your float theme and allows enough room for your group.
- Always ensure the trailer is sturdy and properly secured to the towing vehicle. Safety is important, so double-check everything from brakes to hitch locks.
Choose a Parade Float Theme
A great theme is what ties your float together and helps it stand out in a lineup of entries.
Brainstorm Fun, Recognizable Themes
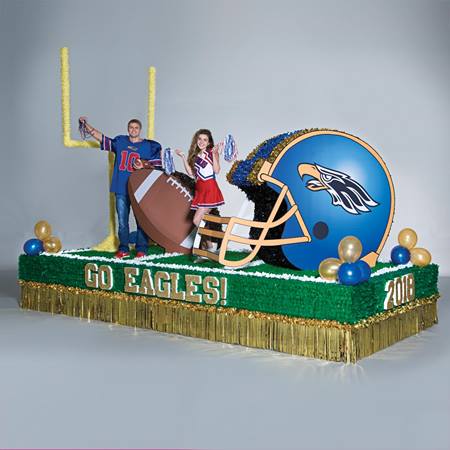
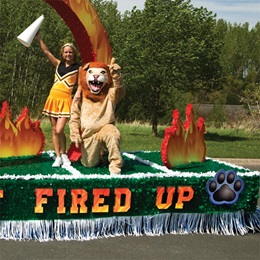
- Celebrate your school spirit with a design featuring your school colors, mascot, and slogan.
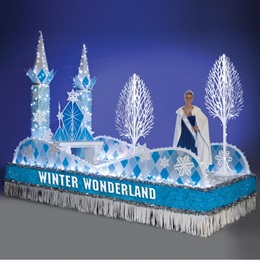
- Choose seasonal motifs like autumn leaves, snowflakes, or fireworks for holiday parades.
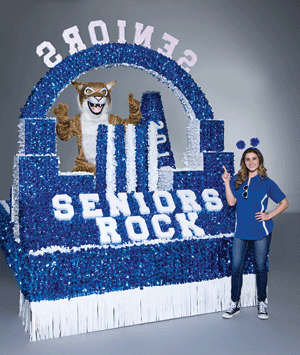
- Represent your club, team, or organization with themes that highlight your mission or achievements.
Pro Tip: Pick a theme that’s visually striking and easy to identify from a distance. Bright colors, bold letters, and recognizable shapes will ensure your float grabs attention.
Plan Your Float Design
Before getting into the nitty-gritty of building, create a design plan to guide your process. A thorough design plan can help you save time, reduce stress, and create a more cohesive final product.
Design Basics
- Sketch out your float’s layout, noting the placement of key elements like arches, props, and banners.
- Factor in the dimensions of your trailer when designing to ensure everything fits and is stable.
Consider Practical Needs
- Use materials that are lightweight (but secure!) to ensure they hold up during the parade.
- If the event is outdoors, prep for weather conditions with waterproof materials.
Use Parade Float Kits for Easy Setup
If building complex structures overwhelms you, parade float kits are your best friend!
Why Use a Float Kit?
Float kits provide pre-designed solutions for major float elements like arches, columns, and prop figures. They simplify construction by bundling materials and instructions together.
At Anderson’s, you’ll find easy-to-assemble kits for everything from sporty themes to whimsical creations. These kits are ideal for high school groups, especially when resources are limited.
Decorate with Parade Float Essentials
The magic of your float lies in its decorations! Layer materials and props strategically to create a polished, dynamic look.
Essential Decorations
- Floral Sheeting: Cover the trailer bed with vinyl or metallic sheeting to create a sleek backdrop.
- Fringe and Festooning: Add fringe or festooning around the float edges for that signature parade look.
- Streamers and Pomps: Create texture and depth with metallic streamers, tissue pomps, or poly pomps.
- Lighting and Props: Use tape lights, styrofoam letters, and life-size stand-ups to add extra flair.
Pro Tip: Layer materials for a dynamic, visually interesting design. For example, start with a sheeted base, line it with fringe, and then add 3D props and lighting elements for maximum impact.
Add Movement and Interactive Elements
Want your float to be the talk of the parade? Make it interactive and dynamic!
Ideas to Add Motion
- Include waving mascots or animated props like spinning wheels.
- Incorporate light-up features or simple moving parts powered by hand or battery.
Audience Engagement
Keep spectators entertained with interactive elements like toss-out favors (mini flags, candy, glow sticks). Just ensure that all tossables are safe and approved by event organizers.
Final Touches and Parade Day Prep
With your float nearly complete, focus on the finishing touches to ensure everything runs smoothly.
Decor and Safety Checks
- Double-check that every decoration is tightly secured with zip ties, rope, or sturdy adhesives. Wind and movement can undo loose items!
- Ensure stability with features like handrails and secure seating for riders.
Emergency Parade Supplies
Bring along a kit with essentials like duct tape, zip ties, scissors, and extra decorations for last-minute adjustments.
Practice and Parade Day Logistics

Your float is ready to shine! But before hitting the road, run through these final steps to guarantee smooth sailing on parade day.
Rehearse Ahead of Time
- Do a dry run, towing the float around to see how it moves and test visibility of signage and decor.
- Coordinate with float riders about their roles and make safety a top priority.
Be Parade-Ready
- Arrive early to the lineup to avoid last-minute stress.
- Pack must-haves like water, sunscreen, and snacks to keep participants energized and happy.
- Make sure you have enough tossables, like beads, mini sport balls, and silicone wristbands, to last the entire parade route.
Make Your Float the Star of the Parade
Building and decorating a parade float doesn’t have to be overwhelming. With a clear plan, creative design, and the right materials, anyone can create a showstopping float that inspires team spirit and community pride.
Start brainstorming themes, grab your essential supplies, and rally your group to make the magic happen! If you’re looking for easy solutions for constructing your float, Anderson’s has everything you need to bring your vision to life. Happy float building!